How to Change Facebook Pages Name

How to Change Facebook Pages Name
Facebook permits Page admins to change a Facebook Page name as long as the name complies with Facebook's standards for Page names. Follow the steps below to change your Facebook Page name:
1. Visit to your Facebook account.

2. Click the drop-down menu icon on the upper-right part of the Page.

3. Click on the Page for which you want to change the name. If the Facebook Page is not displayed, click on the See More alternative to view all the Facebook pages associated with your account.

4. On the target Facebook Page's Web page, click on the More symbol from the menu bar.

5. Click Edit Page Info.

6. On the General tab, Change the Facebook Page name to the new name you have picked.

7. Click Save Changes.

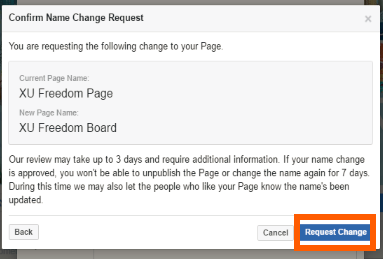
8. A pop-up dialog box will be shown reminding you of your current Facebook Page name and also the new Page name. Approval could use up to three days.

9. Click the Request Change button.
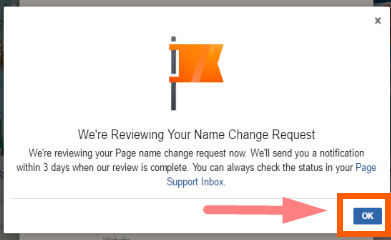
10. An additional message will certainly pop-up telling you that Facebook is reviewing your Facebook name. Click OK.
11. Wait for Facebook to evaluate and approve your new Facebook Page name. Once accepted, your Facebook Page will certainly now have its brand-new name.

I have simply revealed you the best ways to change a Facebook Page name. If you have concerns about transforming your Facebook Page's name, let me understand in the remarks section. Your question could be included in the faqd section.